Key Takeaways
- Nails and other sharp debris cause most of the 3 million tyre punctures that occur annually in the UK.
- Knowing the difference between normal (sudden) and slow punctures helps you spot problems before they become dangerous.
- Road debris, potholes, and bad weather are the main causes of tyre damage on UK roads.
- A good tyre repair kit from AutoPump can help you handle emergency punctures until professional help arrives.
- Regular tyre checks significantly lower your risk of unexpected punctures.
Nails Top the List: What Punctures UK Tyres Most Often
Every year, over 3 million UK drivers deal with tyre punctures. That distinctive thump-thump sound or the steering wheel pulling to one side marks the start of an inconvenient, often costly problem. But what actually causes these flats?
Nails rank as the number one culprit behind tyre punctures across the UK. These ordinary construction materials cause havoc on roads, especially near building sites or areas with DIY waste. When a nail pierces your tyre, it often makes a perfect seal at first – so you might drive for days before noticing a slow leak.
Tyre pressure specialists like have found that construction debris causes about 50% of all puncture-related callouts, with nails causing far more problems than other objects.
Overview of Puncture Types
Punctures come in different forms, and knowing their specific traits can help you address issues before they turn into dangerous situations or costly repairs.
1. Normal Punctures: Sudden Air Loss and Warning Signs
Normal punctures happen when a sharp object makes a substantial hole in your tyre, causing quick air loss. These punctures show themselves right away through several warning signs:
- A loud hissing sound as air escapes
- Visible tyre deflation within minutes
- Vehicle pulling to one side
- Steering wheel vibration
- Dashboard warning lights (on vehicles with tyre pressure monitoring systems)
This type of puncture needs immediate attention since driving on a significantly deflated tyre can damage your wheel rim and potentially cause you to lose control of your vehicle.
2. Slow Punctures: The Silent, Gradual Threat
Unlike their more dramatic counterparts, slow punctures work subtly. They occur when a small object creates a tiny hole or when a seal around your tyre valve gradually fails. The warning signs are much less obvious:
- Gradual pressure loss over days or weeks
- Need to refill your tyre more frequently than normal
- Slight pulling to one side, especially at higher speeds
- Increased fuel consumption due to rolling resistance
Slow punctures can actually be more dangerous than normal ones because they often go undetected for longer periods. Regular pressure checks are your best defence against these silent threats.
The Top 3 Causes of Tyre Punctures
Knowing what causes punctures can help you avoid them. Here are the three most common culprits behind tyre damage on UK roads:
1. Road Debris: Nails, Glass and Construction Materials
The most common cause of tyre punctures is road debris. Construction sites, roadworks, and general litter create a minefield of sharp objects waiting to stick in your tyres. The usual suspects include:
- Nails and screws (particularly common near construction sites)
- Glass fragments from broken bottles
- Metal shards from vehicle accidents
- Sharp stones that have been fractured
- Discarded wire and other metal waste
What makes these objects so dangerous is how they stand upright between road surface bumps, creating the perfect position to pierce a passing tyre. Construction nails are especially problematic due to their hardened steel and their ability to lodge firmly in the tyre tread.
2. Pothole Damage: Beyond Just Suspension Issues
Potholes harm more than just your vehicle’s suspension – they’re a major cause of tyre punctures too. When your tyre hits a pothole, several things can happen:
- The impact can create a “pinch puncture” where the tyre is compressed against the wheel rim
- Sharp edges within the pothole can cut or tear the tyre material
- The sudden stress can cause existing minor damage to turn into a full puncture
- The wheel rim might be damaged, creating a leak where the tyre seals against it
UK roads, particularly after harsh winters, often develop many potholes. The freeze-thaw cycle damages road surfaces, leading to higher risks of tyre damage during winter and early spring months.
3. Weather Conditions: How Rain and Snow Increase Risks
Bad weather doesn’t directly puncture tyres, but it significantly increases the risk by:
- Hiding dangerous debris under water or snow
- Reducing tyre grip, making impacts with debris more likely
- Washing debris into central driving lines from the roadside
- Weakening road surfaces, creating more potholes
- Making tyres more susceptible to damage when cold
Winter driving presents special challenges, as road salt and grit can cause tiny scratches on tyre surfaces, weakening them and making punctures more likely when hitting obstacles.
DIY vs. Professional Puncture Repairs
When you get a puncture, you have two main options: try a DIY repair or get professional help. Each makes sense depending on your situation.
1. When You Can Safely Fix Your Own Puncture
DIY repairs work well in certain situations:
- When the puncture is in the tread area (not the sidewall)
- When the hole is smaller than 6mm in diameter
- When you need a temporary fix to reach a garage
- When you have the right equipment and knowledge
- When you’re in a safe place to do the repair
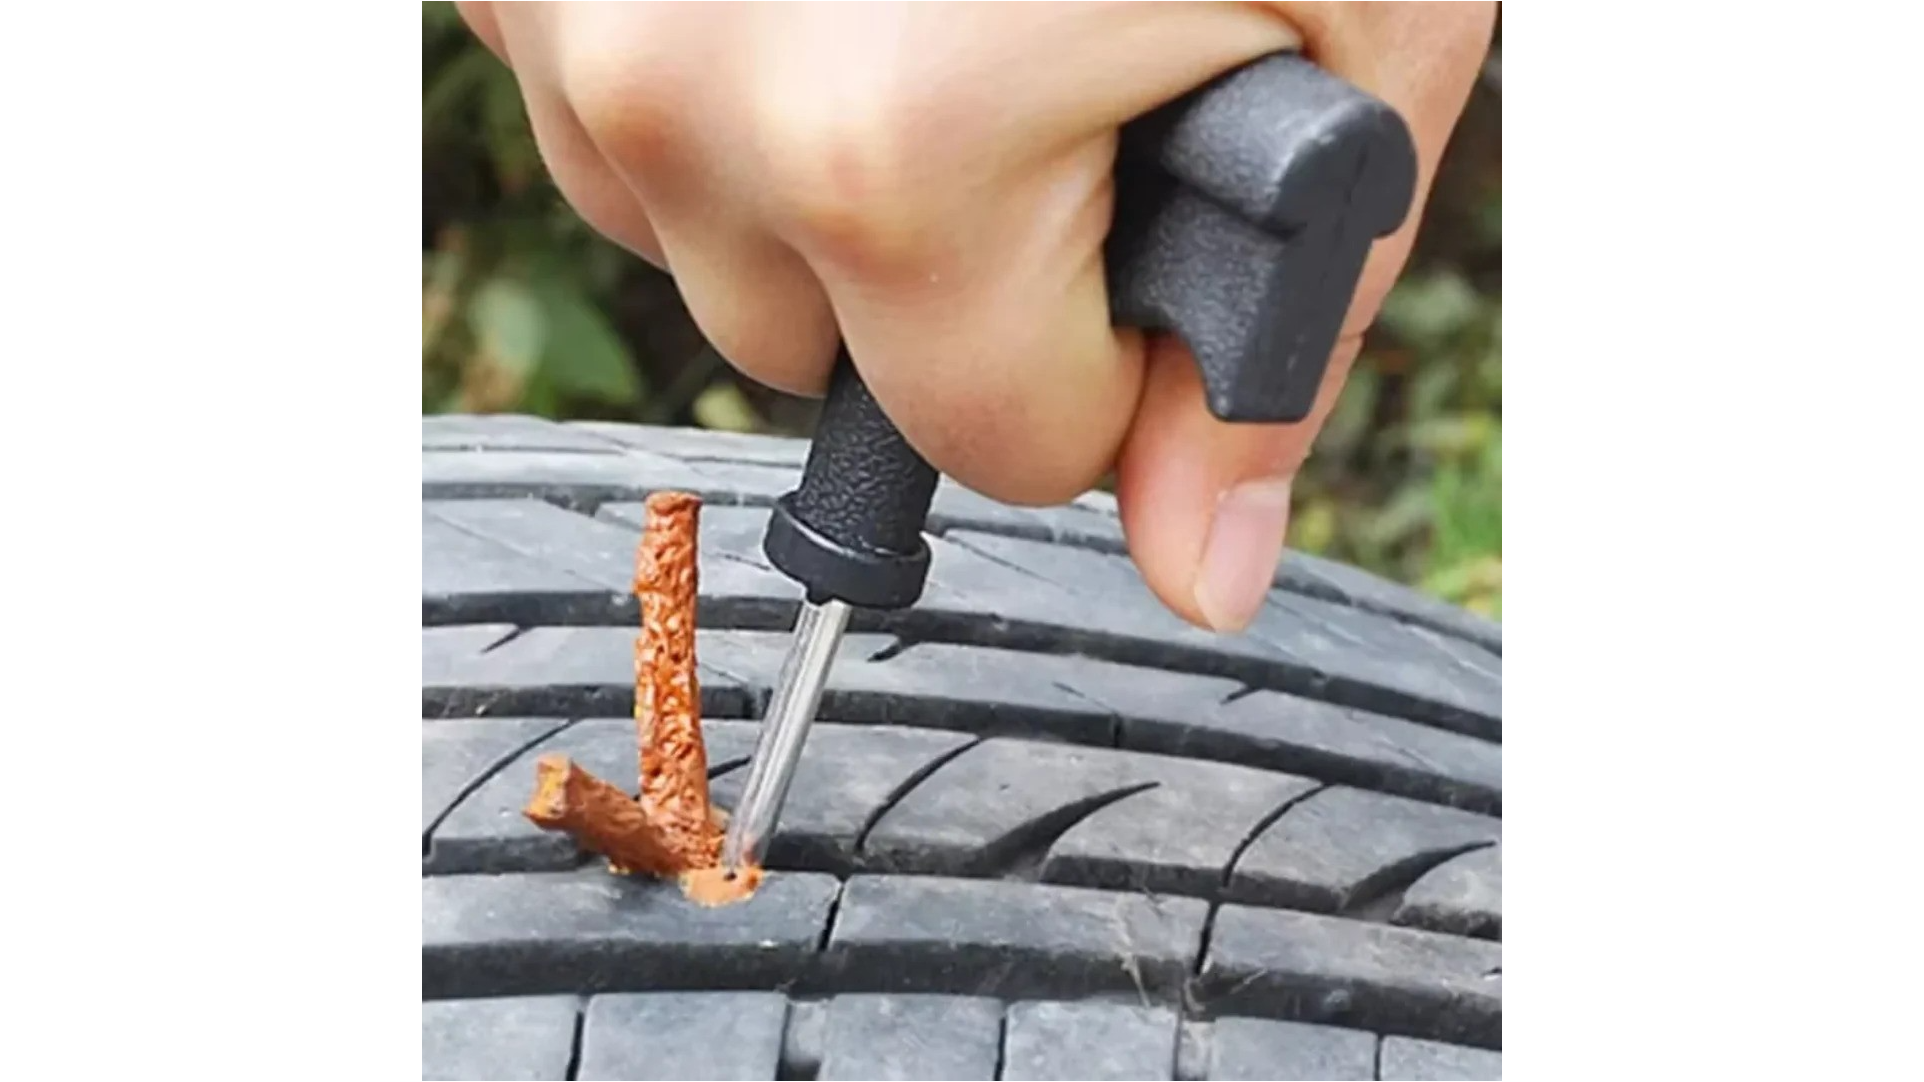
A good tyre repair kit can save the day in these situations. At minimum, your kit should include tyre plugs, a reamer tool to clean the puncture hole, an insertion tool, and rubber cement to ensure a good seal.
The basic process involves finding the puncture, removing the object causing it, reaming the hole to clean it, inserting a plug coated with rubber cement, and then reinflating the tyre. When done properly, this can provide a reliable temporary repair.
2. When You Must Seek Professional Help
Despite the convenience of DIY repairs, some situations require professional assistance:
- When the puncture is in the tyre sidewall (these can never be safely repaired)
- When the hole is larger than 6mm in diameter
- When multiple punctures exist in the same tyre
- When the tyre has previous repairs in the same area
- When the tyre shows signs of aging or extensive wear
Professional tyre technicians follow the British Standard BS AU 159 for tyre repairs, which ensures a proper, safe repair. They have specialist equipment to remove the tyre, inspect it thoroughly from the inside, and apply a permanent patch-plug combination that seals from both the inside and outside.
Emergency Tyre Repair Essentials
1. Must-Have Tools in Your Tyre Repair Kit
A complete emergency tyre repair kit should contain:
- Quality tyre plugs – The main component, these rubber strips seal the puncture
- Reamer tool – Used to clean and prepare the puncture hole
- Insertion tool – Designed to push the plug into the tyre
- Rubber cement – Creates a better seal around the plug
- Pliers – Helps remove the puncturing object safely
- Valve core tool – For removing valve cores when necessary
- Pressure gauge – Essential for checking tyre pressure after repair
- Air compressor or inflator – To reinflate the tyre after repair
Buying a high-quality kit rather than the cheapest option can make the difference between a successful emergency repair and being stranded.
2. Step-by-Step Emergency Puncture Repair Process
When you face a puncture on the roadside, these steps can get you back on the road safely:
- Put safety first: Park in a safe spot away from traffic. Turn on your hazard lights and apply the handbrake.
- Find the puncture: Sometimes it’s obvious (like a nail sticking out), but other times you’ll need to listen for hissing or spray soapy water over the tyre to spot bubbles.
- Remove the object: Using pliers, carefully take out the nail, screw, or other object causing the puncture.
- Prepare the hole: Insert the reamer tool into the puncture and work it in and out several times, making a clean channel for the plug.
- Prepare the plug: Thread a repair plug through the eye of the insertion tool. Apply rubber cement to the plug for better adhesion.
- Insert the plug: Push the insertion tool with the plug into the puncture hole until about 1cm of the plug remains visible outside the tyre.
- Remove the tool: Quickly pull the insertion tool straight out, leaving the plug in place.
- Trim excess material: Cut off any excess plug material that sticks out beyond the tyre tread.
- Inflate the tyre: Use your compressor to inflate the tyre to the recommended pressure (usually found on a sticker inside the driver’s door frame).
- Check for leaks: Apply soapy water to the repair area and watch for bubbles that would show a leak.
3. Safety Precautions While Making Roadside Repairs
Roadside tyre repairs can be dangerous without proper caution. Always:
- Choose a flat, stable surface away from traffic whenever possible
- Wear high-visibility clothing, especially in low light
- Set up warning triangles if you have them to alert other drivers
- Never stand between your vehicle and oncoming traffic
- Work on the side of the vehicle away from the road when possible
- Keep children inside the vehicle during repairs
- Stay aware of your surroundings at all times
If you’re on a busy road or motorway, it’s often safer to call for professional assistance than to attempt a repair yourself.
Prevent Your Next Puncture: Practical Maintenance Tips
The best way to handle punctures is to prevent them from happening. These practical maintenance tips can greatly reduce your risk:
Regular Tyre Inspections
Make a habit of visually checking your tyres at least once a month. Look for:
- Stuck objects that haven’t yet caused a puncture
- Cuts, cracks, or bulges in the tyre surface
- Uneven wear patterns that might indicate alignment issues
- Adequate tread depth (insert a 20p coin in the tread – if you can see the outer band of the coin, your tread is too low)
Maintain Proper Tyre Pressure
Wrong tyre pressure often leads to punctures and tyre damage:
- Under-inflated tyres flex more, creating heat and increasing the risk of failure
- Over-inflated tyres have less contact with the road and are more likely to suffer impact damage
- Check pressure when tyres are cold for the most accurate reading
- Follow the manufacturer’s recommended pressures, not the maximum PSI printed on the tyre
Drive Defensively
Your driving habits can greatly affect your risk of getting a puncture:
- Avoid driving through construction zones when possible
- Keep a safe distance from vehicles ahead to spot and avoid debris
- Slow down when road conditions are poor
- Be extra careful after heavy rain, which can wash debris onto roads
- Stay away from driving over or near the shoulder, where debris often collects
Rotate and Balance Regularly
Proper tyre rotation and balancing ensure even wear and extend tyre life:
- Rotate tyres every 5,000-8,000 miles
- Have wheels balanced when you notice vibration
- Check alignment if your vehicle pulls to one side
Consider Tyre Quality
Not all tyres offer the same puncture resistance:
- Premium tyres often include puncture-resistant technologies
- Some tyres have reinforced sidewalls and tougher compounds
- While costing more initially, higher-quality tyres may save money over time by reducing puncture frequency
Even with the best prevention, punctures can still happen. For roadside emergencies, AutoPump offers reliable tyre repair solutions that save you time, money, and stress when you need help the most.
Comments are closed.